

When I wrote up the plans, I didn’t worry about the lumber lengths. When it came time to build it, I reworked the lengths to work with the lumber left over after Bob built a strawberry tower. It worked out nicely because the shorter length is easy to handle & store- and most importantly, it still breaks flax nicely.
| Part Name | Dimensions | # pieces |
| Top rail | 1 x 3 x 30″ | 2 |
| Top rail center/handle | 1 x 3 x 38″ | 1 |
| bottom rail | 1 x 3 x 28″ | 4 |
| Bottom cross piece | 1 x 3 x 12″ | 2 |
| Top cross piece | 1 x 3 x 4″ | 1 |
| handle cross piece | 1/2″ x 4″ oak dowel | 1 |
| hinge | 1.2″ x 6″ oak dowel | 1 |
| end caps | 1 x 3 x 2 1/4″ | 1 |
| wood screws | 2″ | 22 |
| wood screws or finish nails | 1 1/4″ | 8 |
| metal washers | 1/2″ i.d. 2″ o.d. | 6 |
Assembly directions:
set up the rails with the 1″ dimension on top and the 3″ vertically. Place the rails as follows: a base rail, a top rail, a base rail, the handle rail, a base rail, a top rail, a base rail. While it’s set up, mark up the wood for cutting and drilling.
Mark the top edge of the 4 base rails and the bottom edge of the 3 top rails. These are the flax breaking surfaces of the rails. On the handle side of the brake, the boards are all different lengths. On the hinge side of the boards, they are flush. Take a minute to mark the hinge side of the boards.
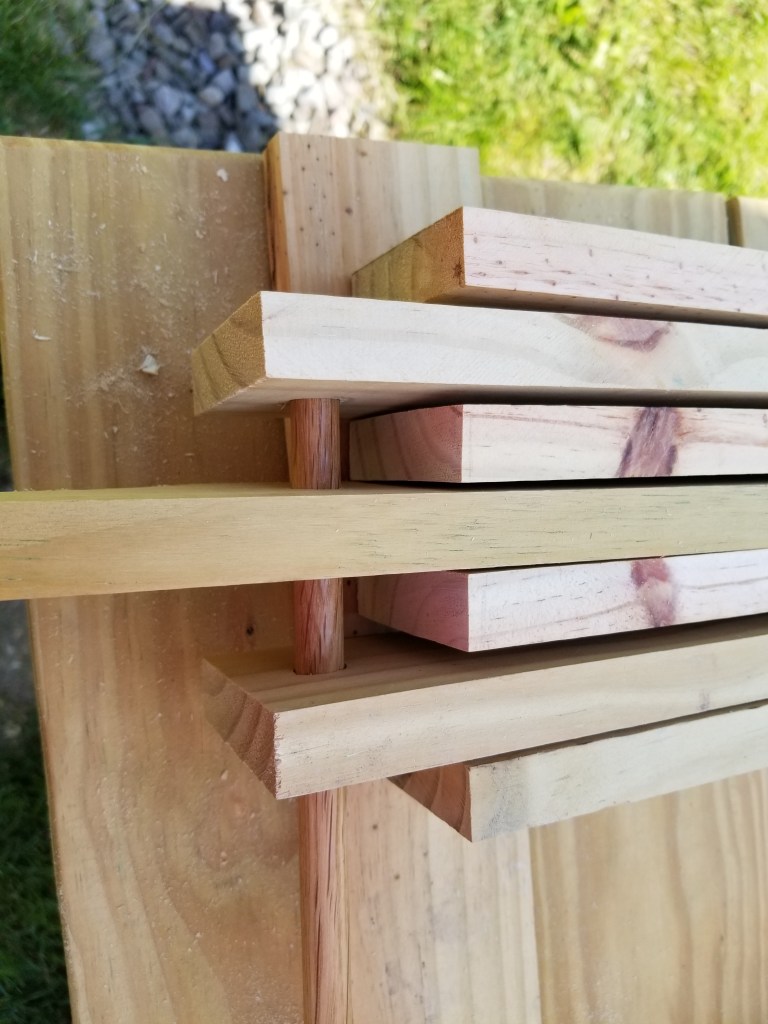
From here on out, I’ll refer to the wood as having handle side ends (the ones shown in the picture) and hinge side ends- the ends that will be fixed in place by the dowel hinge.
Measure in 1 1/2″ from the hinge side end of one of the base pieces and put a mark centered on the board for drilling hinge hole.

Measure in 1″ from the handle side end of the 2 top rails and mark along the center line to indicate where the upper dowel will go. You can see where the handle dowel will end up in the picture to the left.
Shaping the ends of the top rails:
The top rails need to have the corners taken off of the boards where they rotate around the hinge. Otherwise, they will hit the table and prevent you from opening the brake fully. I went ahead and cut a curve around the entire end because I was playing with my saw. You can just chop off the lower corner at a 45 degree, and all will be fine.
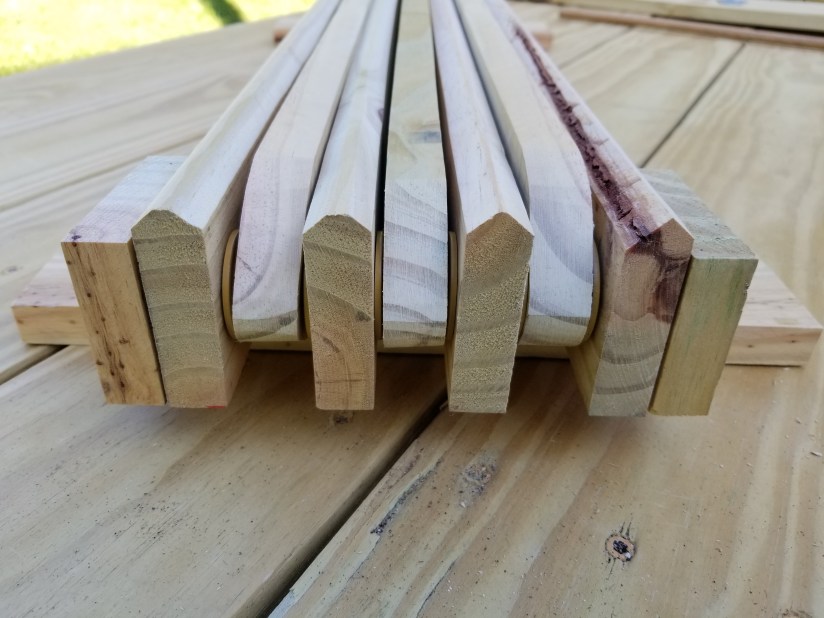
Shaping the sides of the top and base rails:
Either use a sander or a table saw to take the corners off of the flax breaking surfaces of the rails. We used a 40 degree angle on the table saw to cut the corners off of the boards. A belt sander is also a good option. You just need to create some space between the rails and to remove the sharp edges of the lumber so you don’t cut your flax rather than crush it.
Another option is to add more washers or some slightly wider spacers between the rails. I didn’t have any more washers on hand, so decided to shape the rails. In testing, wider spacing kept the rails from cutting the flax but it also made the break points further apart. It took more blows to break the flax.
End block, base rail, top rail, base rail, center handle rail, base rail, top rail, base rail, end block
The dowel runs through all of the pieces except the end blocks
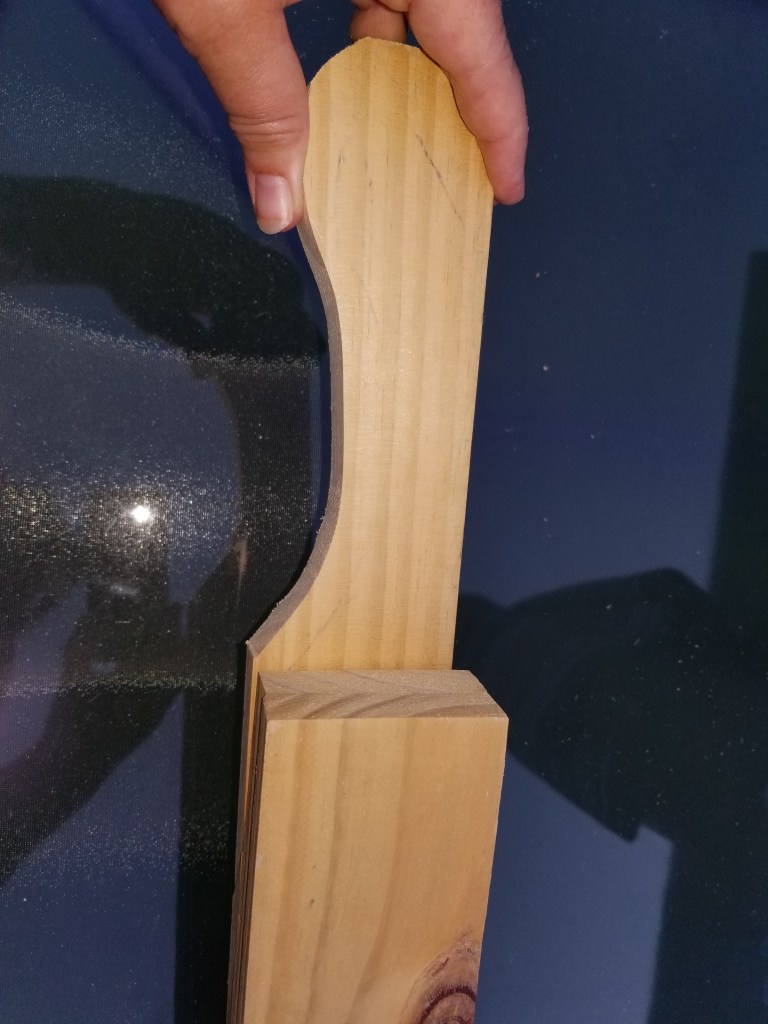
Shaping the handle:
If you’d like, you can shape a more comfortable grip for the handle. I was playing with my new scroll saw, so I did a quick shaping. It will work just fine if you use it without shaping or with a different shape.

Drilling out the hinge holes:
Make a pilot hole in the center of your mark on one of the base rails using a 1/4″ bit. Clamp your base and top rails together and use that hole as a guide to drill a pilot hole through all of the rails. Depending on your clamp and drill bit, you may need to do this in two or three sets of boards rather than all at once.
Using the pilot hole, drill the first rail using a 3/4″ forstner bit. Then, using that hole as a guide, drill out the remaining base rails so all seven holes align- 4 on the bottom rails, 3 on the top rails. If you slide the dowel in, it will fit loosely and the pieces will rotate easily around the dowel.

Drilling out the handle holes:
Using a 1/4″ bit for the pilot hole, drill out a hole where you marked your top rail. Stack your top rails and handle rail together, and using that hole as a guide, drill a pilot hole through all three pieces. Then use a 1/2″ forstner bit for the main hole. The dowel will be a tight fit if you test it.
Note: For an alternate drilling pattern, read the notes at the bottom of the directions
Dry Fitting:
Inserting the washers: Pass the 6″ dowel through the hole in the first base rail. Then, to the end of the dowel, add a washer, a base rail, another washer, a top rail, another washer, a bottom rail, etc- alternating top and bottom rails spaced by washers, making sure the handle rail ends up in the center position. End with the fourth bottom rail. Make sure the top rails have their shaped side down. Bottom rails have their shaped sides facing up.
Screwing on the base pieces
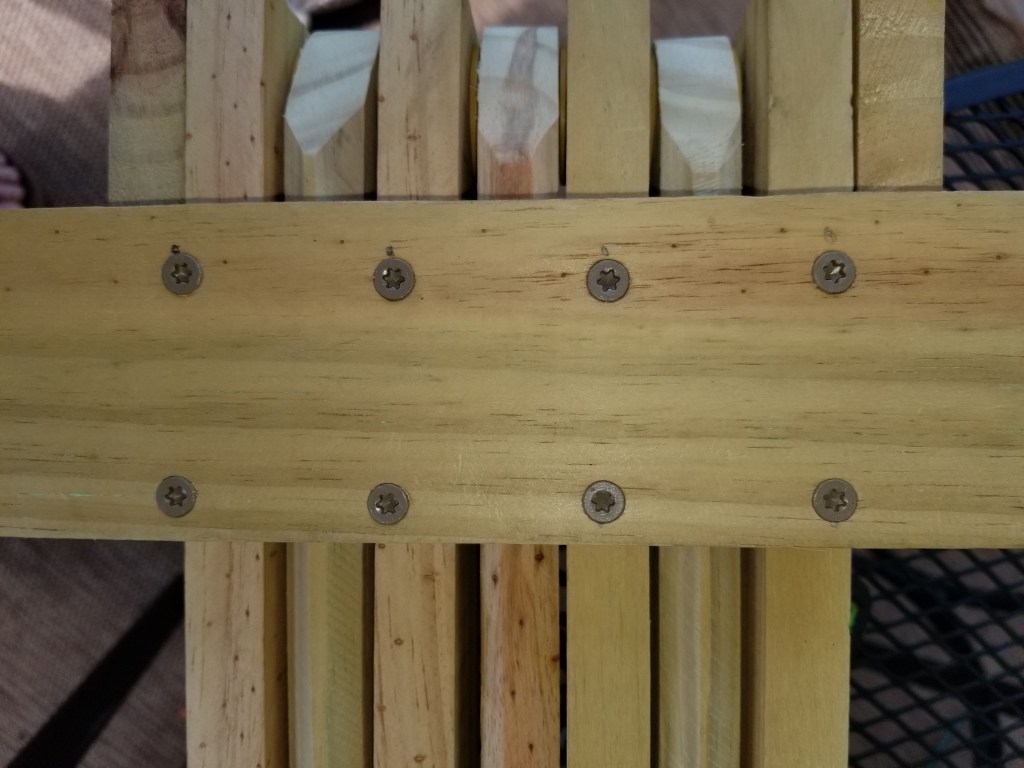
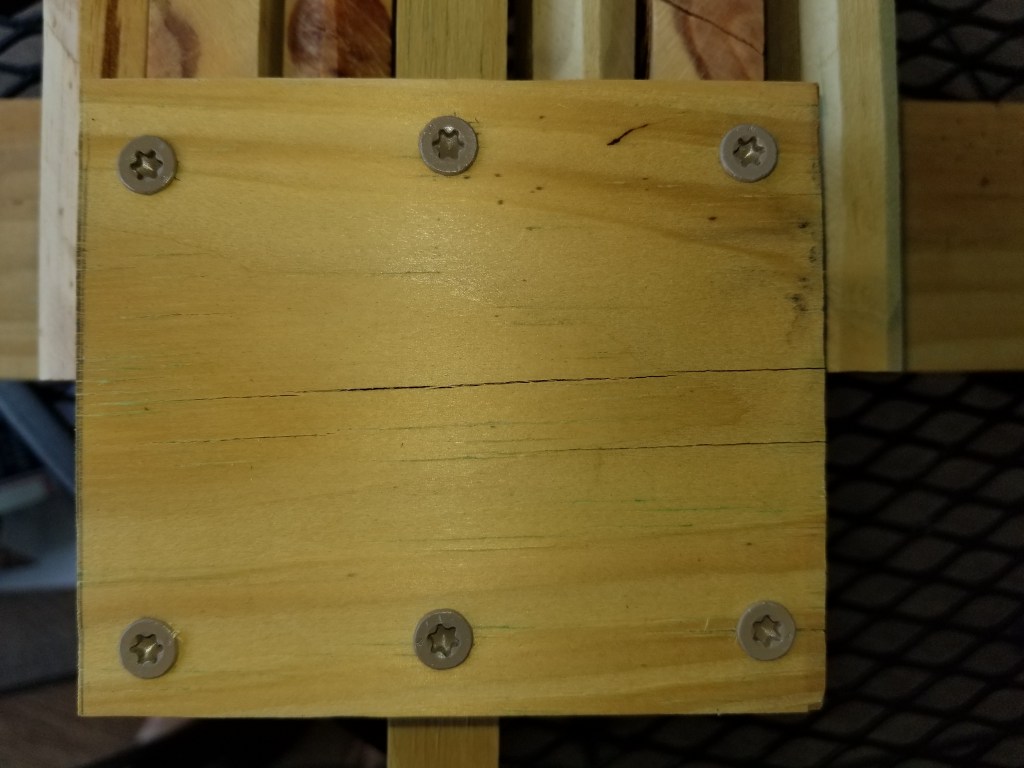
We flipped the whole piece over and screwed the base pieces on to the base rails. Make sure you like the spacing before screwing things together. It would look much nicer if the screws were sunk in a bit and then the holes plugged with some dowel pieces.
I lined the edge of the base with the edge of the rails. This base provides stability for the rails and a place to clamp the rails to the table. The hinge side base piece is set 2 1/4″ in from the end in this one, but we just eyeballed it. I wanted it far enough forward so it wouldn’t interfere with opening but far enough back so that it would stabilize the brake and provide the second clamping point.
We marked out the center of each rail and used a 1/4″ drill bit for pilot holes before driving the screws.
We flipped it base side down and attached the top piece to stabilize the top rails and handle rail. Getting the holes in a straight line would have helped too! Project Building Rule #1: Stop when you get tired.
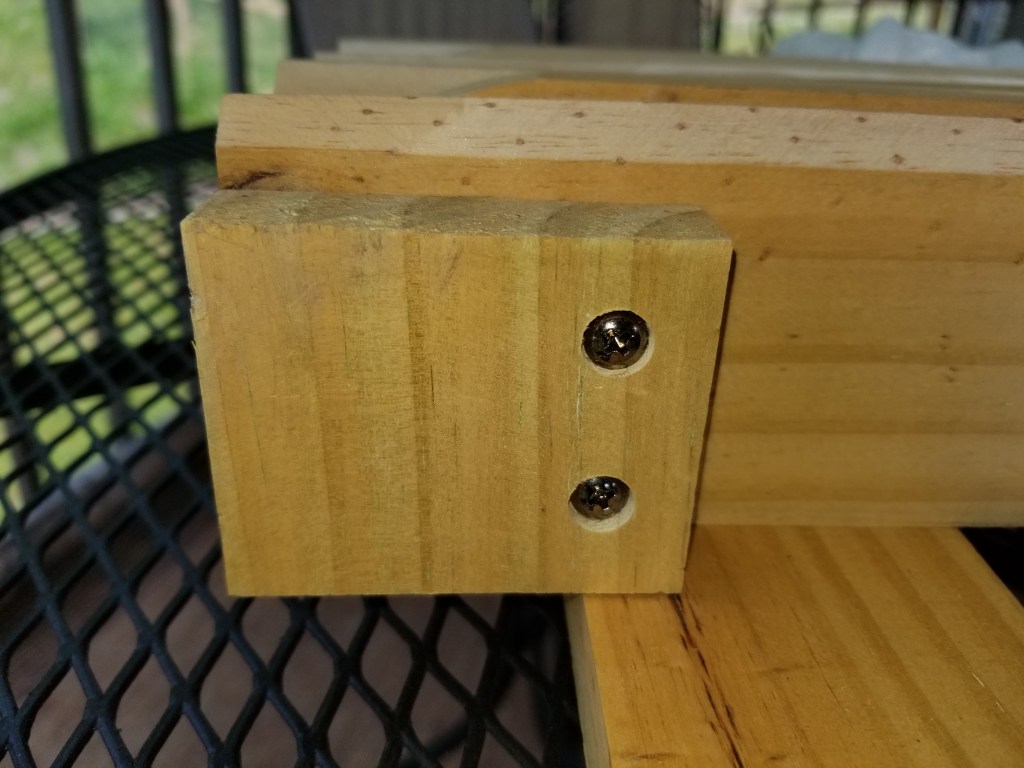
Attaching the end caps:
We put endcaps to keep the hinge dowel from working its way out. Next time, I will try drilling the holes in the outer two base rails to 1/2″ and if the hinge stays loose enough (it should), then I’ll put a bit of wood glue on the outer rails. Finish nails would look so much better. These are the only screws we had on hand of the right length. They will get replaced at some point because yikes! Ugly!
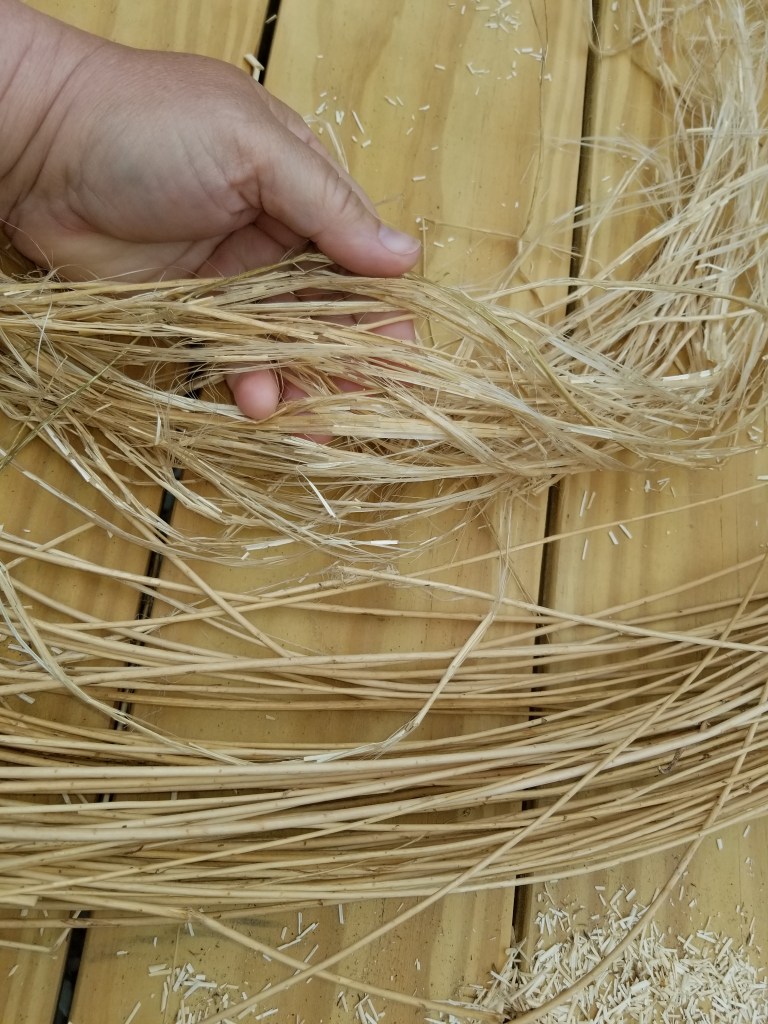
The test run:


Notes:
You can drill the holes in the outer base rails to 1/2″ and skip the end caps. As long as you have enough space between the boards and use washers, the top rails should be loose enough to pivot on the dowel. I’m going to give this a try when I build this from nicer wood.
Instead of screws, you can use dowels to attach the various parts. Or, if that is too fiddly, you can countersink the screws and use small bits of a dowel to hide the screws.
This is a prototype built using leftover and scrap lumber from building a strawberry tower. Bob had a 1″ x 6″ x 12′ leftover, so we ripped that in half. We made the other pieces from ends and discards. The top piece doesn’t need to be 1″ thick, though it adds a nice weight to the top of the brake.
I thought about putting spacer blocks instead of the dowel in the handle, but I liked the look of the dowel and had leftover dowel material on hand.
When I drew this out on paper, everything was 4″longer. The shorter brake works quite well, and I am glad that it is smaller for easy storage.

You say to shape the hinge ends of the bottom rails, but I think it should say the top rails? It looks to me like the bottom rails are fixed, it’s the top ones that rotate. I’m building this today, excited to give it a try! Thank you so
Much for sharing the pattern
LikeLike
You are correct! Whoops! It’s fixed now 🙂 Hoe your brake came out well. Patti
LikeLike
Thank you for posting this! I am so excited to make one!
LikeLike
Built mine today, thanks so much for posting plans!
LikeLike
Thank you for posting this information – it was very helpful and unselfish to do so.
LikeLike
I too will add my thanks! Your clear writeup and generosity in sharing is appreciated.
LikeLike