
My band weaving journey began with an elbow injury which lead to tennis elbow which led to a shoulder thing, and well, I was a mess. I needed to give my body a break, but *not making* would only work if elephant tranquilizer darts were involved.
There are only so many loaves of bread one household can eat, so I pulled out a table loom to try. I loved it! Sadly, changing the shafts locked up the few muscles in my shoulder that had been working. So, I moved to a floor loom. Weaving on a floor loom is even more wonderful than on a table loom! I was prepared to make tea towels for the world. Then Bob’s company pushed back his return to in-person work date. He’ll be working from my studio for the rest of the year. I needed a project that could be as portable as knitting. Backstrap weaving!
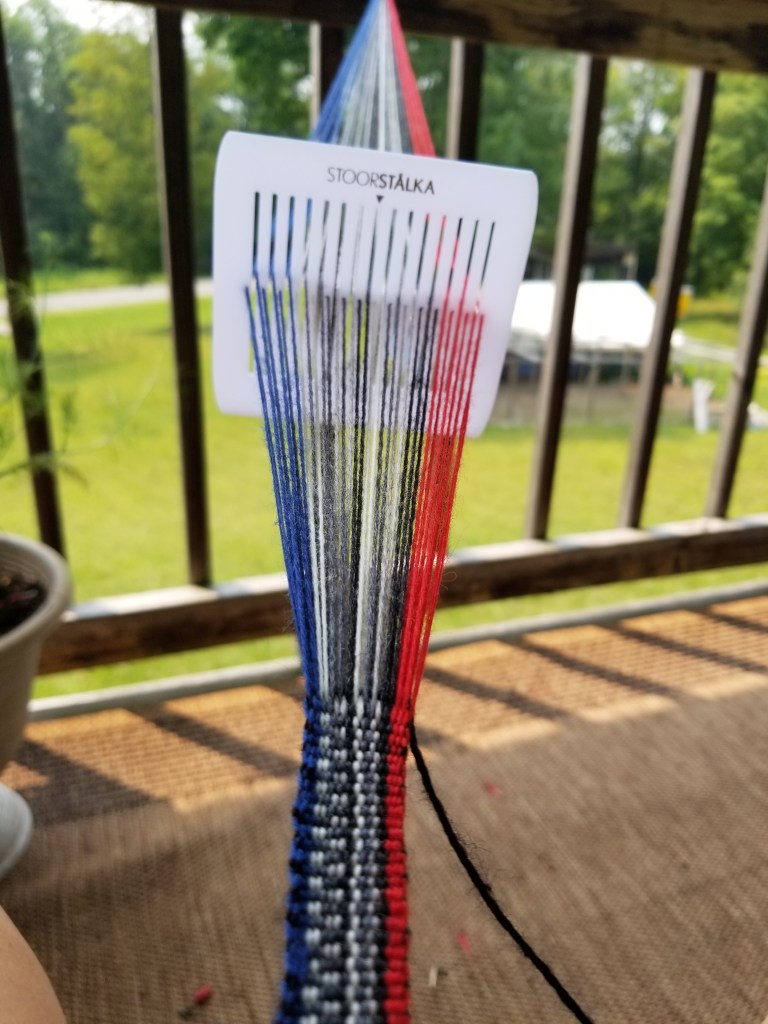
I found a beginner kit for a sami weaving. Ages 10 and up. I’ll be fine, right?! Nope. It wasn’t pretty. Weird black dots appeared in the red stripe. The edges swam drunkenly. The band itself was puckering on the long axis. I knew I was doing something wrong, but I couldn’t figure out what! I broke down and bought an inkle loom so I could remove a variable: the warp tension. The inkle loom has a fixed tension. With my backstrap, the tension on the warp changed every time I moved. Turns out I change my position a lot!
Note For wiggly people: I found my backstrap weaving works better if I put the strap at hip level.

Not perfect, but functional and on the right track. More importantly, it was fun to make.
The inkle loom felt different, and it didn’t take long to figure out the basics. After weaving 2 bands, I felt ready to revisit the backstrap.
I found an article on backstrap basics after writing up this piece. It is brilliant, and I wish I had found it sooner! Here’s the link:
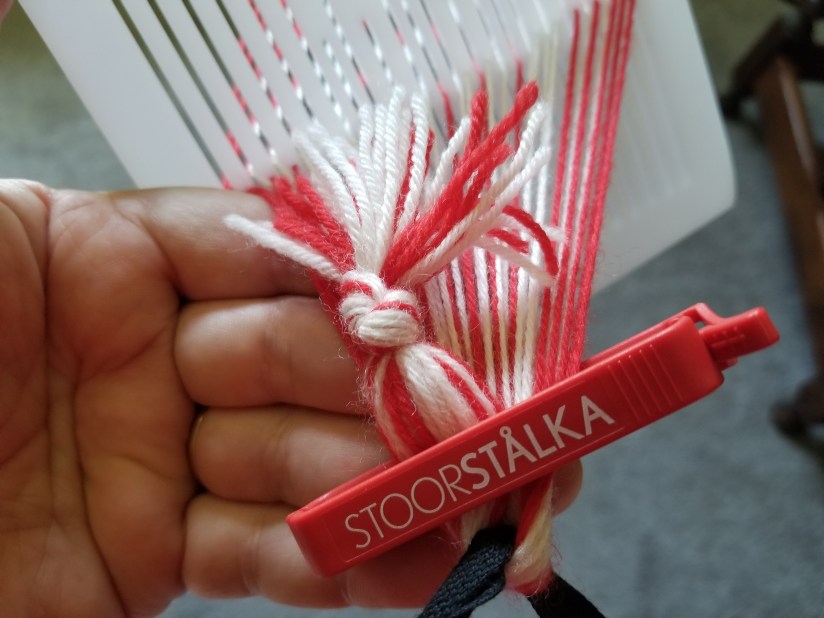
BACK STRAP SET UP: I discovered I had been using the belt improperly. I tied the band to the belt and then folded the clip over the ends. Don’t do that!
The second time around I was able to see a video before starting. The belt goes around the waist/hips and the band folds over the belt to be held in place with a clip. This makes much more sense!

BEATING AND TENSION: The various info I could find on how to weave bands was not super helpful. Beat- not too hard, not too soft. Tension so that the edges stay even and snug, but not too snug and don’t pinch them in. I’m still incredibly new to this, but what is working for me is to beat so that a gentle pull slides the edge loop into place without it popping. If it pops into place, then I make a little pucker on the edge. At first I thought that was what I was after, but then I realized I had the tension on the warp too tight. I backed off a smidge on the warp so I didn’t have to work as hard to beat or tug. This made for smoother edges when I tightened the weft. Basically, I needed to take everything down a notch.
It’s pretty easy to see when I have things too loose because I spend so much time keeping things square. The weft gets saggy and doesn’t create a straight line. The edges are too soft to easily snug up with a tug. So- there a sweet spot, and I took a couple of inches of weaving playing around until I found the warp tension and the beat that made something that was easy to weave and created an even fabric.
HOW WIDE? The width of the band is another thing to play with. It needs to be tightly enough packed so that the weft doesn’t show. I tried a variety of widths- all made perfectly good fabric from a structural standpoint. Some were stiffer. Some drapier. If I was weaving a button band for a cardigan, I would want something with some stretch and give. For a guitar strap, I’d go for a stiffer band.
I found a few resources that gave a useful ballpark width. If you take the wraps per inch of your warp and multiply by 2, that will give you a working ends per inch. Then you can bump up or down from there. On the band below, I used a yarn that is 24 wraps per inch. I warped 65 ends. The band width is 1.25″ – so just a bit tighter than the double the wpi.
I made friends with my backstrap kits and moved on to do the next two Stoorstalka kits. They are like potato chips! I am glad there are only 3- or at least my wallet is glad! Now that I’ve done the sami kits, I feel ready to warp my own and also to try the more traditional backstrap weaving which I’ve seen in Honduras and Guatemala. The rabbithole just keeps going!
Overall, I love backstrap weaving. So many possibilities. So portable!

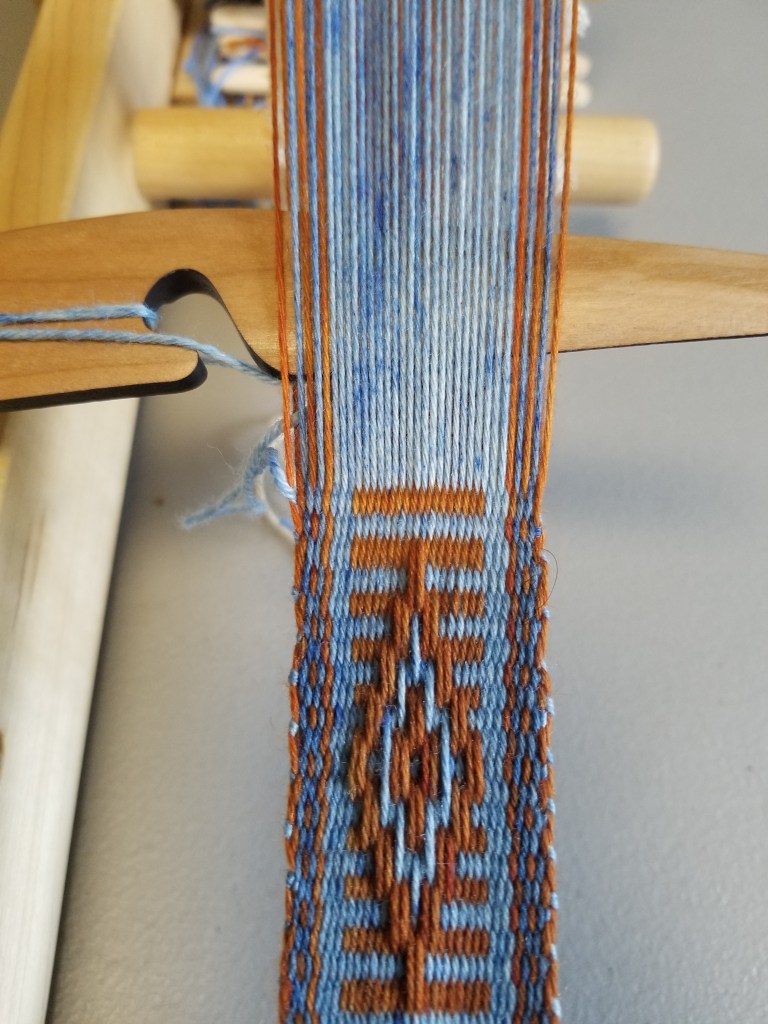
Playing with band width 
Band #2 on the inkle loom 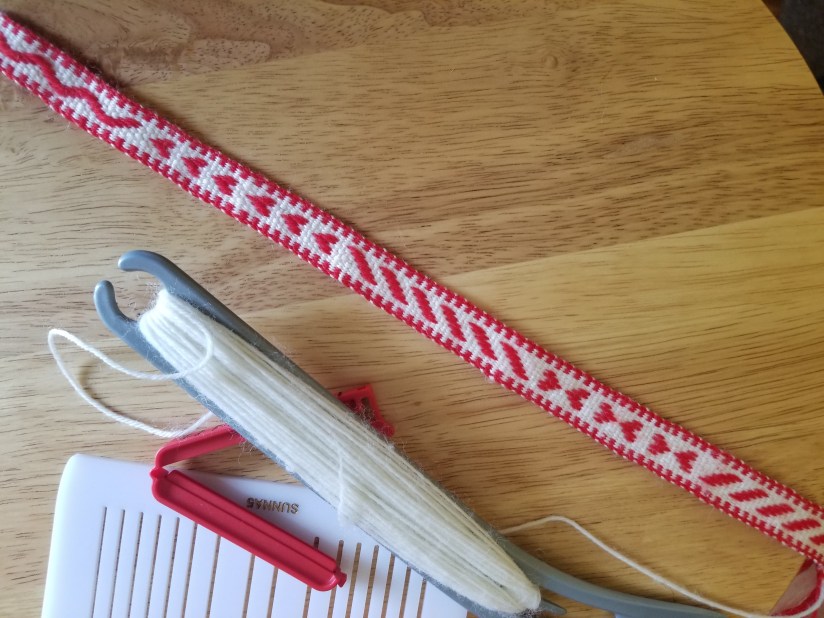
Stoorstalka Kit 3
